 Here is the tutorial for the onesie dress. 🙂
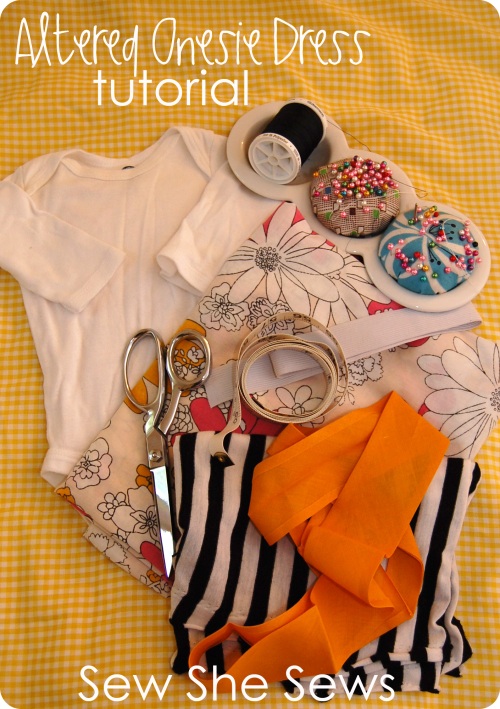
Gather supplies.
- Onesie
- scissors
- fabric for skirt
- various fabric, ribbon, buttons for adornment
- thread
- sewing machine or need and thread
- ruler
- pins
1-1. Measure onesie’s width across.
1-2. Cut onesie off where you would like skirt to be (add around 1/2 inch for seam allowance). *A reader brought up a very good point. If the onesie still fits your little one length wise, you can forgo cutting the onesie and attach the skirt with the bottom still intact. This will leave you with a built in diaper cover! 🙂
2. Using the measurement of the onesie taken earlier, cut your skirt fabric that width x 4. Determine length desired and add 1/2″-1″ on each end for seam allowances. If using vintage sheets, you can measure, make a little snip in the fabric and rip it to size 🙂
3. Hem the bottom of the skirt piece first. Then sew the sides together. I used a felled french seam since I didn’t have a serger and didn’t want to zig zag. Any of the 3 are suitable. This will make a tube.
4-5. Gather the top of the skirt. This can be done with a special gathering or ruffler presser foot, or you can baste (large stitches) and gather. If gathering, you will want to make the skirt half the size on front and back to fit the onesie.
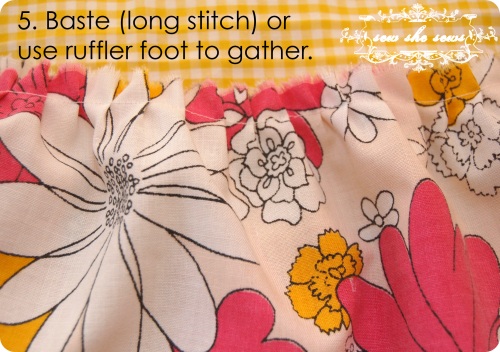
6. Turn your skirt inside out. Tuck the onesie inside the skirt so that the raw edges match together right sides together. Pin at the side seams and then in the middle in front and back. Arrange gathers equally in the quarters of the onesie and pin into place.
7. Sew onesie to skirt. Make sure your seam allowance goes below that gathering stitches so they don’t show. Flip right side out.
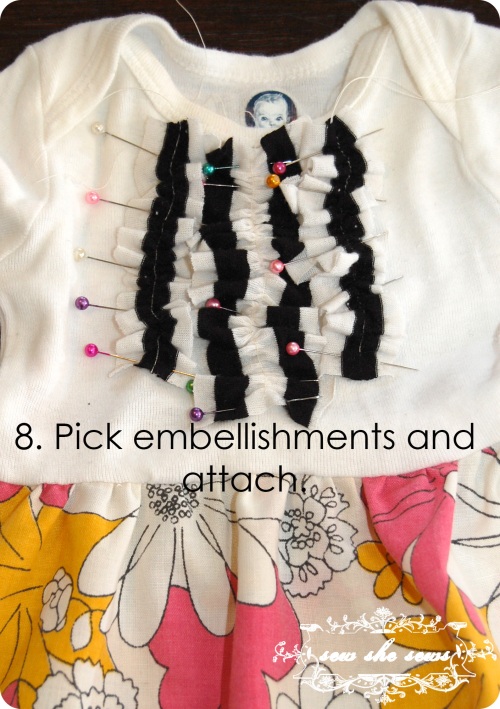
8. Determine how you want to accessorize the dress and attach with pins and sew. For this dress I cut striped knit jersey into strips and gathered them into ruffles.
9. You are done! Dress that little sweetheart up and hit the town 🙂
Tutorial for personal use only. Have a wonderful wednesday! 🙂









Super cute!!! I sure hope you’ll send me some. 🙂 I miss and love you!
Very cute! Thanks for the tutorial.
She looks like she’s thinking, jeez mom, I have to model again? 😉
How about attaching the skirt directly to the body, without cutting it? This, of course, if the body is not too small allready 🙂
oh you totally could! These are snug now so I wanted something she could wear for a while. Good idea! 🙂
I think she prefers this one, look how pleased she is with herself! It is lovely, I am going to try it out! Thanks for the lovely blog. Please don’t stop. Veerle
OMG she is so adorable! Love the altered onesie. Thanks for adding this to the link party.
Nice Tutorial. would have to do these for my baby next time..
Baby Girl Summer Dress